Display your beautiful fabrics, then reuse them when you find the perfect project April 30, 2013
Posted by Sindy in Home Decor, Jewelry, My Original Ideas, Tutorial Tuesday.1 comment so far
Like many people who sew, I collect fabric. And, of course, that collection mostly consists of beautiful fabric that I’m either waiting for the perfect project to use it, or I don’t want to waste such a lovely piece. And then, there’s my box full of frames that never got finished, and a grocery bag full of extra 5×7 picture mats that I found at the dollar store years ago (and no, I don’t have frames to go with them). What in the world can I do with all this stuff?
Now, I’d show you the photo I found that led to this tutorial’s inspiration, but I’ve sadly lost the link. I’ve seen the idea before – take an artist’s canvas and cover it with fabric. This time I had an “aha!” moment – Cover my unfinished frames and extra mats with fabric. No one can tell the difference, and you can even reuse the fabric for a project after enjoying it on your wall. This would also work for display beautiful scarves, hankies, etc. PLUS you can use it for your jewelry too!
Fabric Frames
Supplies:
– Empty wood frame or mat big enough for you fabric, but small enough so the fabric wraps nicely around the frame (note: the frame must be wood if you want to use the first method shown below)
– Fabric, scarf, hanky, doily, etc. large enough to wrap around your frame, but not too big so it’s bulky in the back
– Thumb tacks
– Needle nose pliers (not pictured)
– Hammer (not pictured)
– Double-stick tape
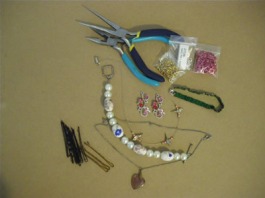
– Jewelry pieces like pins and earrings that match your fabric
Gah! No Time! April 29, 2013
Posted by Sindy in Journal.add a comment
I’m really short on time today. Big day at work, and it won’t stop ’till late tonight, forgot to post earlier so I’ll make this brief.
This week I helped with a fundraiser for my local library. We did a little tea party based on the book Anne of Green Gables. I was able to use my fake British accent to teach a little about ettiquite and for a poetry reading. One lady said my accent was so good she couldn’t tell if it was real or not. 🙂
In prep for that I had a bit of fun with hats putting together a costume. I’ll have to post pics later.
Besides that I did a ton of cleaning (as I mentioned on Tuesday), finally finished my tatting homework, and I messed up converting an XL tee to a 9month tee. I seriously need to learn how to sew properly.
Well, got to go. See you tomorrow. (Thankfully I have my tutorial mostly ready.)
The Latest Hair Trend – Looks Good with Short Hair Too April 23, 2013
Posted by Sindy in Fashion, Jewelry, Tutorial Tuesday.add a comment
Oh no! I’ve been doing some Spring cleaning today and almost forgot to put up the tutorial for Tutorial Tuesday! Then I’ll make this quick.
The other day I was watching several of anneorshine‘s YouTube videos. In one of them she and Cute Girls Hairstyles showed how to make one of the latest hair trends – Hair Jewelry! (You can watch her video here >).
I was so excited to learn about hair jewelry since I have a short hairstyle and can’t do much variation with it, so here’s my little version.
Hair Jewelry:
Supplies:
– Your choice of jewelry or jewelry pieces (you can use necklaces, bracelets, earrings, or just jewelry pieces or chains from the craft store – it’s best to use lighter weight pieces, especially if your hair is wispy like mine)
– Bobby pins (or whatever you call them)
– Jewelry pliers
– Jump rings
Of Soap Boxes, and Too Much Internet TV April 22, 2013
Posted by Sindy in Business DIY, Journal.add a comment
WIDTW – Crocheting, Tatting, Nephews, and sick
So this week I finaly finished the crocheted dress for my cousin’s little tike, but I haven’t delivered it yet. Speaking of which, I need to get it into my bag to deliver after work today.
After that I did a ton of tatting. At the end of the month I need to have five motifs and three edgings done, but I’ve only done four of the motifs and haven’t even started the edgings. I know I can make it, but it’s going to be tight. Thankfully I have my other homework out of the way (we learned dimpled and dimensional tatting this week) and he’s going on vacation for a week giving us a break, so that will help.
Speaking of dimensional tatting, it comes with a business lesson. Dimensional tatting was originally called something else, but when a guild used the name in a publication (they even gave the original developer credit for the technique!) she sued the socks off of them for using the name! So now no one calls it that, and no one knows who developed the method. It reminds me of a blog post by While She Naps that I read this week about how crafters should be nice, and even help, those who want to recreate your designs on their own. People buy from people who are nice to them. Simple as that.
Okay, off my soapbox. Besides crocheting and tatting, my apartment is getting sadly neglected. I need to make some time to clean this next week.
I did take some time to go play with a couple of my nephews. I don’t think there’s anything more precocious than little boys. They can certainly be a fun handful.
Finally I ended the week by being foolish – I watched 8 straight hours of Internet TV and got super sick from it. Mom says it’s probably because I’m related to my Dad who’s super sensitive to screens. She’s probably right since this doesn’t happen if I just read for 8 straight hours. Yet another reason why the printed book with never go out of style.
That’s it for this week. Have fun!
A Calendar that Matches Any Decor? Sweet! April 16, 2013
Posted by Sindy in Tutorial Tuesday.add a comment
It’s tax day (well, yesterday when I wrote this), so it’s time for a quick and easy tutorial.
When was the last time you spent $3 or less on a calendar? Okay, so you might be like me and get them from the dollar store. Um, when was the last time you bought one for a dollar… that was reusable? How about one that you could switch up to match your current decorating whim? How about one that matched your new paint perfectly? (Ha! Got you on that one.) Time for today’s tutorial.
Paint Chip Whiteboard Calendar
Supplies:
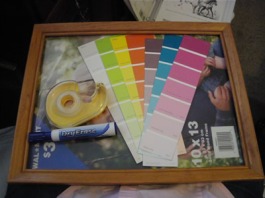
– Seven paint chip strips. You know – the samples of paint colors you can get free at your local hardware store or big-box store. Can be a nice mix of colors, or they can be all the same. Try to get lighter ones so you can see the marker against them.
– A frame with glass. Mine is 10 x 13 because of the size of my paint chips, but if your paint chips are smaller you can try a smaller fraime.
– Background paper of your choice. I just used the paper that came in the frame – I just flipped it over and used the back.
– Double-stick tape
– Flat-head screwdriver
– Overhead/wet erase marker. I use an overhead marker instead of a whiteboard marker cause it doesn’t rub off at the slightest touch.
– Anything you need to hang your calendar
The Internet Needs More Preemie Patterns April 15, 2013
Posted by Sindy in Internet Resources, Journal, Patterns, WIDTW.add a comment
What I Did This Week: Besides finally catching up with my tatting homework and learning needle tatting in my class (I’m so excited!), and not touching my book at all this week, this past Saturday was my cousin’s baby shower, so I had to make something for her. And since the little cutie is a preemie, I just had to make something extra special.
I have a soft spot for preemie babies. I was a preemie myself, born four weeks early and only 5 lbs. I wasn’t the tiniest thing, but my Mom tells stories of cutting a third off the preemie diapers the hospital gave her and tiny doll dresses that my great-grandma made for me. So when my cousin had her tiny four lb baby five weeks early I imediately thought about making a little dress that would fit her.
I had already researched making preemie clothes for a friend who started an organization called Angel Babies that helps parents who’s tiny tikes don’t live long. Many of them didn’t develop enough to survive, and many of them are tiny preemies.
Sady, my great-grandma was lucky when she made my little doll dress – most doll patterns aren’t the right proportions for a preemie, so I went on a search to find some preemie patterns online. According to some medical study (of which I can’t seem to find right now) the rate of preemie births is increasing (mostly because of the behavior of the parents, but that’s another topic), and even full-term babies tend to be skinny little mites when they’re first born, so this should be easy, right? Apparently not. According to the clothes in retail stores “preemie” size just means an inch shorter. That’s not going to do.
I did find a couple good resources though:
– For people who sew, my friend’s Angel Babies website has a few patterns
– And for people who crochet, Bev’s Country Cottage has some great patterns
– And a couple sizing charts (Note: Sizing preemies is just an “averages” game. Sizes and proportions can vary widely.)
– http://www.heartfeltangels.com/Sizes.html
– http://www.ebay.com/gds/Preemie-Clothing-Size-Chart/10000000005631703/g.html
Preemie’s have special requirements when it comes to clothes. Their little furnaces don’t work yet, so a warm hat is almost required. The smaller the baby the thinner their skin so they can’t wear booties or socks and you have to design clothes to be easier to get the baby in. Oh, and the fabric or yarn needs to be super soft, and no big lumps from things like buttons and bows in the back. I like to use fingering size yarn (super skinny), which I’ve only found in yarn specialty shops, and flat buttons, and it’s good to have clothes that open all the way down the back to make it easiest to put it on.
If you know of a great preemie pattern online, let me know! Also, you’re welcome to donate handmade items to Angel Babies.
Tutorial Tuesday – Double Layer Cream Cheese Pie April 9, 2013
Posted by Sindy in Cooking, Tutorial Tuesday.add a comment
So I mentioned on pie day this idea for a cream cheese pie. Well, it didn’t happen until last Monday. Oh well. Anyway, here’s a lovely tutorial on how to do it yourself.
Double-Layer Cream Cheese Pie
Ings:
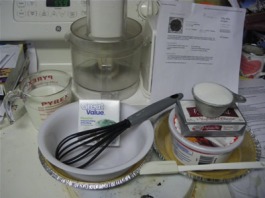
2 (9 in) graham cracker pie crusts
1 (8 oz) cream cheese
1/2 C sugar
1 tub whipped topping, thawed
1 pkg pudding mix
1 3/4 milk (or whatever the pudding mix says for pie filling)
Tools:
– food processor (or blender, or mixer, or a super-strong hunk)
– spatula
– bowl
– whisk
– measuring cups
– recipe (of course)
What I Did This Week (WIDTW) – Tatting, More Tatting, Wire Ball, More Tatting April 8, 2013
Posted by Sindy in Journal.add a comment
You may notice that I changed from “What I Did This Weekend” to “What I Did This Week.” Yeah, I realized I do most of my crafting in the evenings.
To start off the week I did some of my tatting homework. This week we learned split rings in my class. I already knew how to do split rings, just not the “proper” way. I made a super cool snowflake with them which just might be the pattern I use for this year’s tatted snowflakes that I give as gifts.
Tuesday and Wednesday were long days of work, so I didn’t do much in the way of crafting.
Thursday I finished drawing the two pages for my book (my critique group still hasn’t looked at it yet), then I printed up some coloring tutorials (shoot, I should have gathered the URLs to share with you), then I felt like spending the rest of the work day crafting. I was trying to create a better method of making salad dressing instead of trying to shove mayo through the skinny neck of a recycled salad dressing bottle, so I bought a measuring/mixing bottle at my local retailer. The sad part was that it didn’t come with one of those handy wire mixing balls. You may have seen them in those smoothy bottles that were popular for a while. I could not find one of these wire balls for the life of me, so being a good DIYer I made one. NOTE: This activity is not recommended for anyone who doesn’t like challenges or holes in their fingers. I ended up buying a whisk (mostly for the food grade wire) and using the metal disk that came with it to hold things in place while I twisted wires through and around and ended up with something that I hope will work.
This weekend while I watched my church’s broadcast on Saturday I got more tatting done trying to catch up on my homework. I didn’t get as much done as I wanted. Kind of happens when you’re trying to take notes at the same time. And of course, I don’t do crafting on Sunday.
So for the most part, this week was kind of ho-hum. I did however find some great videos by craftypod.com talking about setting up and managing a crafty business. I long to have a crafty business. Maybe one day I will (to supplement my writing income of course). I got a ton of great ideas from these videos including ideas for my writing business. Go check them out!
And speaking of ideas, one of the videos mentioned a website called CRAFTS are the new CRAFTS. It’s just a random generator pretending to predict the next great fad, and if you think about it in terms of craft ideas (and crafty product ideas) it is hilarious! Some of the great ones I got were “Geoducks are the new Typewriters” (Geoducks are a funny looking shellfish – Google it), and “Saxophones are the new Zombies.” Can you imagine a typewriter with shellfish for keys or plushy saxophone zombies? LOL!
Then my sister sent me a great link of what super heroines would look like if they were modest. Besides being a big proponent of modesty, I think it’s a fabulous fashion design challenge (anyone can design a strapless dress, but to design within the constraints of modesty takes talent, plus everyone is wearing strapless and I like to be different). These are some great designs and I might use some of the concepts in some of my designs.
That webpage lead to another fun page: 18 snacks you can microwave in a mug, including brownies (of course), omletes, and even a muffin. Sigh, I always have too many fun things on my list to try.
Well I need to run (I should be in the shower prepping for work). See you tomorrow!
Tutorial Tuesday – Ice Necklace April 2, 2013
Posted by Sindy in Tutorial Tuesday.1 comment so far
I know we just got done with a long and cold winter, and it’s barely starting to thaw our bones, but it’s also time to start thinking about the coming heat – mostly because now is when the reusable ice cubes are in the dollar stores (at least in my area).
You may have seen those neck coolers – they’re just a tube of fabric with water beads in them – well, this is a different kind of neck cooler. I’ve been using the neck coolers for years, and they’re starting to show. And besides, they’re not that fashionable to begin with. Then about a year ago I found a mention of these.
Ice Necklace
Supplies:
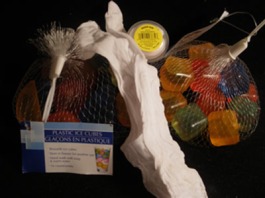
1 pair queen size knee-hi nylons (white is best, but you’re welcome to use any color)
1 pkg reusable ice cubes (at least 10)
Tools:
– hands
What I Did This Weekend (WIDTW) – Blogs, Drawing, Shopping, Easter, Tatting April 1, 2013
Posted by Sindy in Journal.add a comment
Welcome to my new regular Monday posts called What I Did This Weekend! Okay, so the name is slightly misleading – it might often include stuff I did during the week too, and even if it doesn’t I usually mean Saturday as the “Weekend” (since Sunday is religious worship). I’m planning on including photos of some of the stuff I did and previews of upcoming tutorials.
With my goal to improve my blogs I also thought I’d start not just talking about ideas, but actually doing them – and better yet, teach you how to do them too. So, introducing Tutorial Tuesday starting tomorrow! The goal is to photograph my crafting adventures and help you copy them via a tutorial. I thought the name was fun, so I’m posting them on Tuesdays (let me know if that works for you or not).
Now with something on Mondays and Tuesdays, that leaves the rest of the week wide open. I might add something later, or I might not. Maybe I’ll move the tutorials to Friday (need to come up with a new name though), or maybe a Fashion Friday. Let me know what you think. What are some of your favorite features you’ve seen on other craft blogs? What do you wish they’d do? That said, let’s get started!
I think I will start by telling you that I am slightly disappointed in myself while at the same time I’m rather proud of myself. I’m proud that I almost achieved my goal of finishing drawing two pages of my book. I’m disappointed that I *almost* achieved said goal. I worked my tail off (and missed helping a friend move) and I only have one piece left to draw, BUT that one last piece needs some major brain-thinking of how I’m going to present it so it will have to wait until next week.
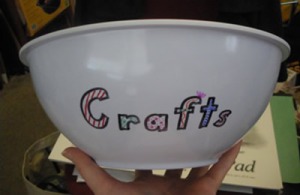
After that I went shopping (note to self: pay off credit card after shopping). I got some paint chips for a project (tutorial coming), bought a stevia plant for my Mom for Easter, and I started gathering ingredients for some bubble jet (I didn’t find washing soda at Wal-mart though). I even got a bowl for mixing crafting stuff (like the bubble jet). I drew on it so I’d remember to use only crafts in it.
And I finally found some reusable ice cubes at the dollar store!!!!! I’ve been waiting to find those for almost a year! I took a moment out of my schedule to made a quick gift out of them for my Mom for Easter. Don’t worry, I’ll post the tutorial soon (maybe tomorrow?).
I also found some chayote squash. I had seen them before (when my sister-in-law received one in a Bountiful Basket), but never tasted one. Apparently you can just wash and cut them. You can use the entire thing, skin, seed, etc. and you can eat it raw or cooked, in a salad or stew, casserole, salsa, etc. Well, I tried them in my famous microwave squash recipe (another tutorial I should do – it’s super easy) and WOW! It’s wonderful! I think I have a new favorite squash.
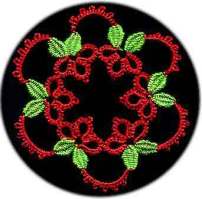
Then I finished out the day (Saturday) with my tatting homework. This week we learned how to do cluny leaves – something I’ve been wanting to learn for years. I can’t wait until my teacher shows us how to do stand-alone cluny that goes from point A to point A instead of A to B like regular cluny! That might be a year or more out there though. Sigh.

